.svg)


Gone are the glorious days of desktop apps. Back in the 90's, when the “web” was only in its infancy, downloading and installing applications to your local machines were the norm.
However, over time, the web has matured into the giant it is today, and from it spawned the modern “web-based application” that we all know and love for the unmatched accessibility and ease of use.
However, desktop applications are far from dead. In fact, they have only grown to be more sophisticated and require so much more power to operate. To ensure their performance and functionality, desktop application testing is a must.
In this article, we’ll explore the ins and outs of desktop testing. We’ll also show you how easy and simple it is to automate desktop app testing with an automation testing tool.
1. Desktop Testing Fundamentals
Let’s begin with the fundamentals: What is desktop testing?
Desktop testing is the process of testing desktop applications. The end goal is to check its quality, functionality, and performance before launching and after updates.
But what exactly is “testing”?
Let’s say the year is 1988, and you are in charge of desktop testing for a revolutionary, groundbreaking application that (unknown to you at the time) will change the world of graphic design forever. That application is called Photoshop, and it has a feature called Adjust Brightness.

As a desktop tester, this is your goal: ensure that this feature works properly. So what do you do? You open the app, you upload an image, and you adjust its brightness to certain predefined levels. If the image’s brightness is properly adjusted at each level you set, you can confidently say that you have tested the desktop app.
Of course, this is an oversimplified example of desktop testing, but you get the idea. Normally, if it was so easy to find a bug, all apps would have run smoothly, and there would be no crash nor Bug Reporting pop-ups. However, in reality, bugs tend to be more sneaky. It takes a combination of several interactions with the app to trigger one.
That is when the QA team shines.

2. Choose Your Approach to Desktop Testing
Generally, there are two approaches to desktop testing: manual testing vs. automated testing.
- Manual testing is when you manually interact with the application to check the feature and find bugs. Normally you would follow a specific order of test steps to trigger the bug.
- Automation testing is when you write an automation script (using a framework or an automation testing tool) to interact with the application on a system level. You only have to write the script once, but you can execute it how many times you want. It is clear that automation testing is much faster and more productive, but you do need to have some expertise in testing frameworks.
The example of Photoshop we mentioned above is manual testing. Here are the test steps you need to follow:
- Launch Photoshop.
- Open an image.
- Navigate the mouse to the “Adjust Brightness” feature.
- Adjust the brightness and verify the interaction with the image.
- Check if the numerical input works by typing in several values from 0 to 100.
- Check the undo/redo functionality.
- Repeat the test with different image types.
You can see how time-consuming it would be to test with different image types. Imagine doing this with hundreds of features. There are so many variables to account for during testing that manual testing becomes counter-intuitive.
The same test can be done automatically. Simply write a script to perform those actions. You can set up the script to perform the test on a wide variety of image types also.
Learn More: Manual Testing vs. Automation Testing: A Detailed Comparison
Now that we know that automation testing is great, it raises the question: Is manual testing actually that bad?
The answer is no. For software testing in general and desktop testing in particular, manual testing still has its place. For example, it would be great to manually test the system before doing the automation to “get to know” the app. This practice is called exploratory testing, which is essentially just playing around with the app until you intuitively know the critical areas to target.

3. Desktop App Testing vs. Web App Testing

Web-based apps are hosted on the web server, allowing access from any user with an internet connection. Desktop apps run on personal computers or workstations, allowing access from the single machine on which it is installed.
This leads to differences in the testing environments of desktop and web apps testing.
In other words, desktop app testing is simpler in terms of intranets, where the number of its clients and servers are specified. In web apps, you have to ensure the app is compatible with multiple browsers and operating systems (OS).
A desktop app is normally used by a single user on a specific operating system. This means you will have a specific environment to test and monitor results.
Some common types of desktop app testing techniques include:
- Functionality testing
- GUI feature testing
- Load testing
- Backend (database) testing
- Memory leaks defect testing
- Compatibility testing
Meanwhile, web apps are tested for their functionality, usability, accessibility, compatibility, performance, and security.
Learn More: What is Web Testing? A Detailed Comparison
4. Benefits of Desktop Testing
Testing and bugs go hand-in-hand. Without testing, we can’t find bugs, and without bugs, we don’t need testing anymore. The end goal of desktop testing is to always uncover those annoying, app-breaking, revenue-decreasing defects for the dev team to address.
We can think of desktop testing as a way to continuously maintain and enhance software quality.
Maintain comes first. Every time a new update is rolled out, users expect that old bugs have been fixed, and no new bugs are introduced. Testing ensures exactly that.
Enhance comes second, although over time it gradually gains prominence. We want to continuously identify areas of optimization and improvement.
5. The Desktop Testing Process

This six-stage process, referred to as the Software Testing Life Cycle, is known as the standard procedure for the software testing industry. QA teams start from Requirement Analysis where they try to understand the objectives of the testing project, then gradually plan and develop test cases, configure the test environment, before executing those tests and analyzing the results.
Let’s dive in.
Stage 1: Requirement Analysis
At this stage, we are concerned with the question of what’s to be tested. Usually there are many stakeholders involved, most commonly being the product owner and the dev team. They consolidate the insights collected from users or their own discussions into a document called the Requirement Traceability Matrix (RTM). This is the foundation for the test strategy.
Read more: Test Plan vs. Test Strategy
If this is the first time you test a certain software, it is better to include an exploratory testing session here. The goal of exploratory testing is to add a touch of human creativity and intuition to the testing process. After all, you (or the QA team) has never worked with the software before, so it is better to play around for a little bit before the actual testing commences.
So, what do you do? You simply launch the software and explore. Try to see if there are any “suspicious” areas that may have a bug. Pay special attention to features that have many dependencies, or features with complex workflows. That is where the bugs typically lie.
Read more: A Complete Guide to Exploratory Testing
Stage 2: Test Planning
Once you have all of the information ready, it is planning time. You will need another document to list what it is that you want to test in this desktop app. These items will be your “test case,” and test case management should have already started by the time you plan the project. This should save you a lot of time and effort down the road.
Here are some more items to put in your test plan:
- Test objectives to define exactly what you want to achieve by the end of the project (i.e., fully examine the functionality/usability/security/performance of the desktop application)
- Deliverables to specify what test cases will be completed
- Test scope to specify which area will and will not be tested
- Resources to specify the cost associated with the project, including human resources, testing tools, test environment, API usage cost, etc.
- Timeline to specify the milestones and align it with the development timeline
There should also be a contingency plan to adjust those variables in case the project moves in an unexpected direction.
These are the most common types of testing to be included in your project:
- Installation/Uninstallation testing – to check if both processes are smooth and if there are any issues on different OS/hardware-software configuration.
- Compatibility testing – to check if the application can run on different systems.
- Functional testing – to check if the key features of the app are working as expected, and at the same time check if the error and exception scenarios are handled gracefully.
- Security testing – to check if there are any vulnerabilities that can be exploited for malicious purposes.
Read more: What is Penetration Testing?
Stage 3: Test Case Development
This is where the real work begins.
If you decide to take the manual approach, the test steps should have been carefully listed during the test planning phase. For simple test cases, you may not need to be too detailed, but for some test cases with complex and specific sets of actions required to trigger the bug, it is necessary to list the test steps.
Don’t know where to begin? Here are some sample test cases to get you started:
- Test Cases for Login Page
- Test Cases for Registration Page
- Test Cases for Banking Application
- Test Cases for Search Functionality
For automation testing, things get a little bit easier. It is recommended that QA teams have test analytics functionality engineered into the automation test scripts from the get-go. Once they execute the tests, it automatically registers the results and compiles everything into a unified spreadsheet that everyone can view later.
Of course, you can leverage dedicated test management tools like Xray, TestRail, or Testiny to help you with such administrative tasks. They give you visibility into which test cases passed and which test cases failed, and give you a comprehensive view over the application’s quality.
It is also possible to go with a simple spreadsheet with columns dedicated to the test steps, results, findings, and suggestions for developers to reproduce/address those bugs. However, the effort it takes to maintain this spreadsheet grows exponentially as your application gets more complex.

Stage 4: Test Environment Setup
You can start testing immediately on your test machine once you have the test cases ready. The test machine is where your application is installed.
However, this only works if your test machine runs on the same OS version that you want to be tested on. You need to do some additional work if you want to test on multiple OS versions.
To achieve that, you can either invest in another machine that runs those OS versions or run on a virtual machine using a virtualization software, such as VMware, Hyper-V, or KVM. It is easy to see that the latter option is a better bet for your team.
Performance testing for desktop applications is another topic. The technical specifications of a machine correlate directly with the performance of an application installed on it. You’ll need to pay attention to the disk IO, CPU, and memory speed.
Stage 5: Test Execution
The focus now shifts to the test execution order, the documentation, reporting, and how we can automate the execution process.
Generally test cases are prioritized by importance and complexity. During the test case development stage, QA teams usually assign each test case a specific tag to track and categorize them. Several good categories are:
- Severity (High - Medium - Low)
- Bug type (Functional/Performance/Usability/Security)
- Areas of impact
- Frequency of occurrence
You can also execute tests in parallel to increase productivity. The approach is to divide test cases into smaller subsets, each with a group of related test cases (defined by their tags) to be executed independently of each other.

Stage 6: Test Cycle Closure
This is the final stage. Here we compile all of the analytics collected in the previous phase and visualize them to create a comprehensive view over your testing effectiveness.
For desktop testing in particular, QA teams usually pay close attention to the following metrics:
- Test coverage: the percentage of possible test scenarios covered by the test cases.
- Defect Density: the number of defects identified per unit of code/feature. This metric shows you the critical areas that need extra attention from the application, and can be a great reference point to develop a good test strategy.
- Test Pass/Fail rate: the number of test cases that pass/fail during execution. However, be mindful that a passed test does not equate to a working application, and vice versa, a failed test does not equate to failure in the product. What if someone misunderstood the requirement and turned that misunderstanding into a test case? Be mindful of false positives and false negatives when considering this metric.
6. Desktop Testing: A Tutorial With Katalon

Katalon is a comprehensive desktop testing tool with features that support the entire testing life cycle. Normally, you would need to plan and strategize the project separately on a spreadsheet or a task management system such as Jira. After that, you must create your test cases with a framework, then execute them, and then go back to the test management system you previously built to update the data. This creates fragmentation in the process. Katalon comes in and unifies all of those steps in one platform.
To start, let’s download and install Katalon Studio. You immediately get access to all of Katalon’s powerful features that will kick-start your desktop testing within minutes:
Learn More About Katalon Studio
or
Start Katalon Free Trial and Witness its Power in Action
If you want to test on the current machine, make sure to also have WinAppDriver. You can install it straight in Katalon Studio once you have it up and running.
To have a new test case, you need a Katalon project in which you store that test case. Simply go to File > New > Project and create a new one.

Since we’re testing a desktop application, make sure to choose your “Type” as desktop. The cool thing about testing with Katalon is that you can test on a rich array of AUTs: web, API, mobile, and of course, desktop apps. This versatility means you don’t have to constantly switch between tools for different types of applications
Once done, you can create your new test case immediately by clicking on the icon at the toolbar:

You can name your test case, write a description for it, and assign any tags you like.

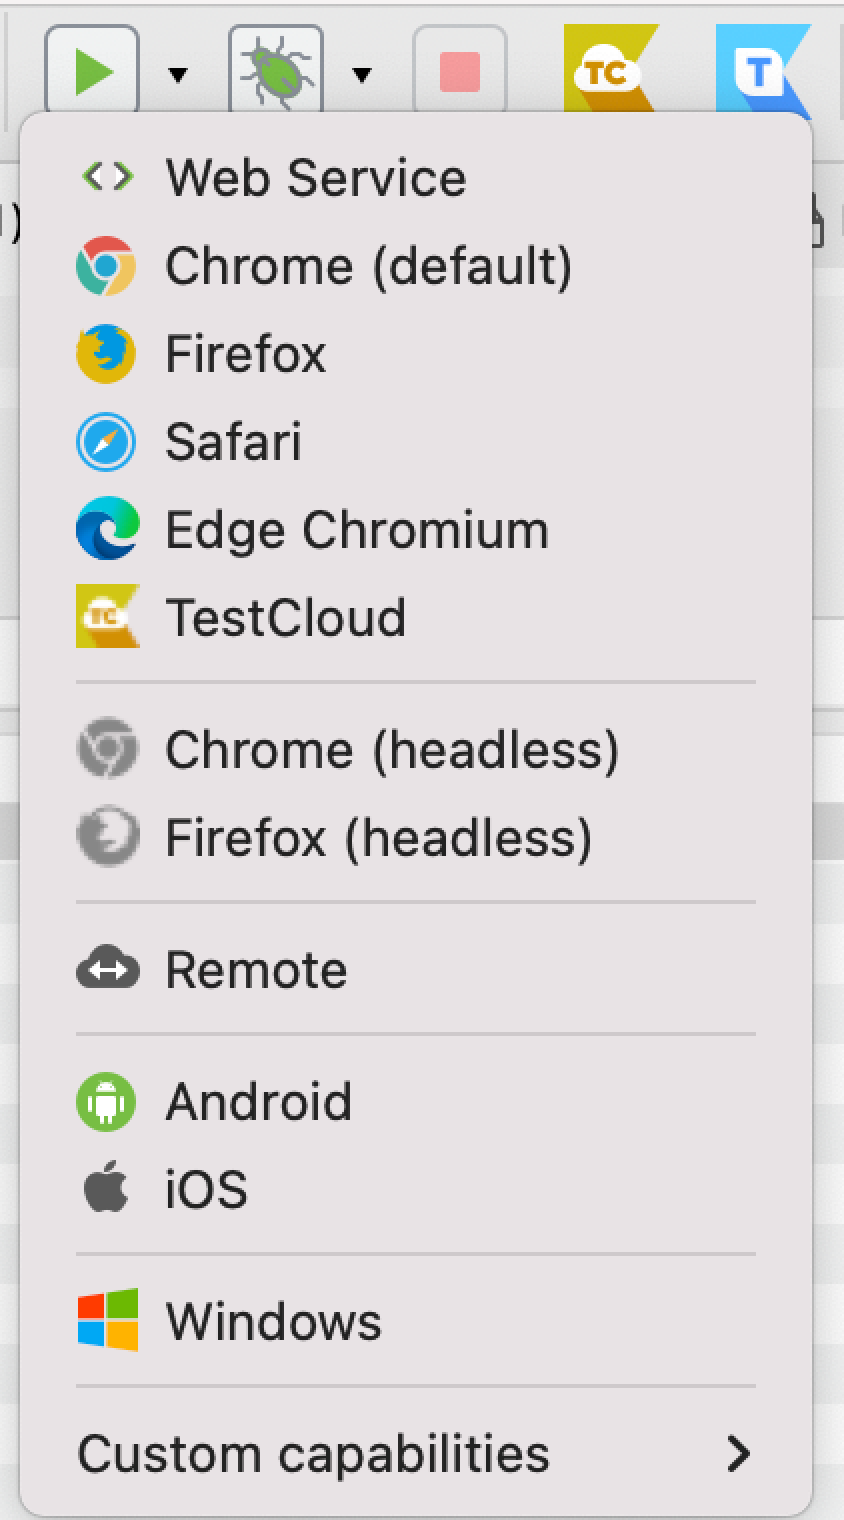
In Katalon Studio, you have three test creation modes: No-code, Low-code, and Full-code. The full spectrum of testing is in front of you! Let’s go into the “New Test Case” and add keywords. These keywords are just code snippets that automate specific interactions in the AUT (application under test) of your choice. As you can see here, we have:
- Web UI Keyword
- Mobile Keyword
- Cucumber Keywords
- Web Service Keyword
- Windows Keyword
- Custom Keyword (you can create keywords that automate any action you want)

What does this mean for the tester? This means you can literally craft a test case simply by choosing the corresponding keywords for each test step. For example, if you want to automate a “Click” action, simply choose the keyword “Click,” and specify what object you want it to click on.
Let’s go one step further. You can choose the Windows Recorder feature and perform your test manually in the application. Katalon records your sequence of actions and turns them into a fully executable test script. Talking about simplicity!

Any test cases created and executed are logged in Katalon TestOps. It takes care of the administrative tasks so you can focus on what truly matters: testing.

6. Desktop Testing Best Practices

- Have a plan before testing: A concrete plan helps you identify the predefined requirements and prioritize which tests to automate. Make sure your team fully understands the requirements in the early stage. Identify which state the application under test (AUT) needs to be in so that you can easily navigate through a particular state in the future. Plan ahead the required set of data as well as how to best create, consume, and clean them up.
- Identify the best suited testing framework and tool: Figuring out the most suitable framework is an important step to maximize the capabilities of the testing process. There is no one-size-fits-all type when it comes to automation testing tools. For instance, there are desktop automation tools available for a specific operating system, while other tools are restricted to certain scripting languages.
- Pick an element locator strategy: When testing desktop apps, you need a solution that best supports the inspection of UI elements. Depending on the AUT, your team must choose a tool that can show properties such as name, ID, class name, and so on, in the testing process.
- Minimize project maintenance: Desktop app testing projects can be hectic without proper management in both test design and tool usage. This problem can be resolved by embracing a low-maintenance mindset: prioritizing the reusability and maintenance of test artifacts throughout every stage of desktop app testing.
You May Be Interested: How To Move From Manual To Automation Testing?
|